Snow peas, also known as sugar snap peas, are a delicious and nutritious addition to any garden. Not only are they easy to grow, but they also provide a bountiful harvest of crisp, sweet pods that can be enjoyed in a variety of dishes. In this article, we will discuss the steps to successfully grow snow peas in your own backyard.
What You Will Need
Before we dive into the steps, let's first gather the necessary materials for growing snow peas:
- Snow pea seeds
- Garden soil or potting mix
- Garden trowel
- Watering can or hose
- Fertilizer (optional)
- Trellis or support structure (optional)
Step 1: Choose the Right Time to Plant
Snow peas are a cool-season crop, meaning they thrive in cooler temperatures and can tolerate light frosts. The best time to plant snow peas is in early spring, as soon as the soil can be worked. If you live in a warmer climate, you can also plant snow peas in the fall for a winter harvest.
Step 2: Prepare the Soil
Snow peas prefer well-draining, fertile soil with a pH level between 6.0 and 7.0. If your soil is too acidic, you can add lime to raise the pH level. If it is too alkaline, you can add sulfur to lower the pH level. It is also recommended to mix in some compost or aged manure to provide the plants with essential nutrients.
If you are planting snow peas in a container, make sure to use a good quality potting mix that is specifically formulated for vegetables.
Step 3: Plant the Seeds
Snow peas can be directly sown into the ground or started indoors and transplanted. If you are starting them indoors, sow the seeds in biodegradable pots about 4-6 weeks before the last frost date. Once the seedlings have grown to about 3 inches tall, they can be transplanted into the garden.
If you are directly sowing the seeds, make sure to plant them about 1 inch deep and 2 inches apart. You can also plant them in rows, with each row being 12-18 inches apart.
Step 4: Water Regularly
Snow peas require consistent moisture to thrive. Keep the soil evenly moist, but not waterlogged. Water at the base of the plants to avoid getting the foliage wet, which can lead to fungal diseases. During hot and dry weather, you may need to water more frequently.
Step 5: Provide Adequate Sunlight
Snow peas prefer full sun, meaning they need at least 6-8 hours of sunlight per day. If you are planting them in a shadier area, make sure they still receive at least 4-6 hours of sunlight. If you are growing snow peas in a container, make sure to place it in a sunny spot.
Step 6: Fertilize (Optional)
Snow peas are not heavy feeders, but if you want to give them a boost, you can fertilize them with a balanced fertilizer once they start to flower. Follow the instructions on the fertilizer package for the correct application rate.
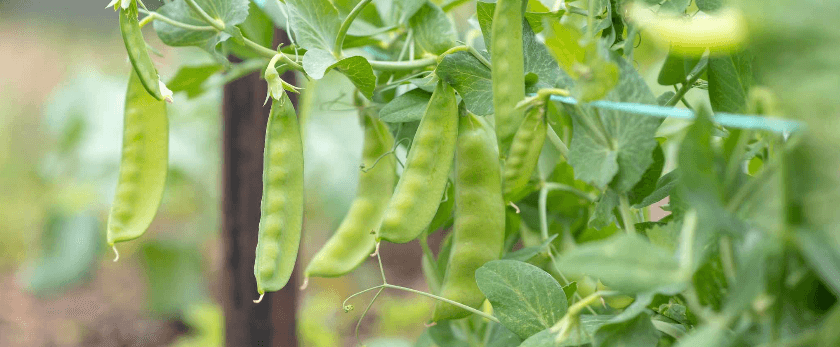
Step 7: Provide Support (Optional)
Snow peas are a climbing plant and will benefit from a trellis or support structure. This will not only help keep the plants upright but also make harvesting easier. You can use a simple trellis made of bamboo poles or a wire mesh fence.
Step 8: Prune (Optional)
Pruning is not necessary for snow peas, but it can help promote better air circulation and prevent diseases. If you notice any dead or damaged leaves, remove them promptly. You can also pinch off the growing tips of the plants once they reach the top of the support structure to encourage bushier growth.
Common Problems with Snow Peas
While snow peas are relatively easy to grow, they can still face some common problems. Here are a few to watch out for:
- Powdery mildew: This fungal disease appears as a white powdery substance on the leaves. To prevent it, make sure to water at the base of the plants and avoid getting the foliage wet.
- Aphids: These small insects can suck the sap from the plants, causing stunted growth and distorted leaves. You can control them by spraying the plants with a strong stream of water or using an insecticidal soap.
- Birds: Birds may be attracted to the sweet pods of snow peas. To protect your harvest, you can cover the plants with netting or use scare tactics like reflective tape or fake predators.
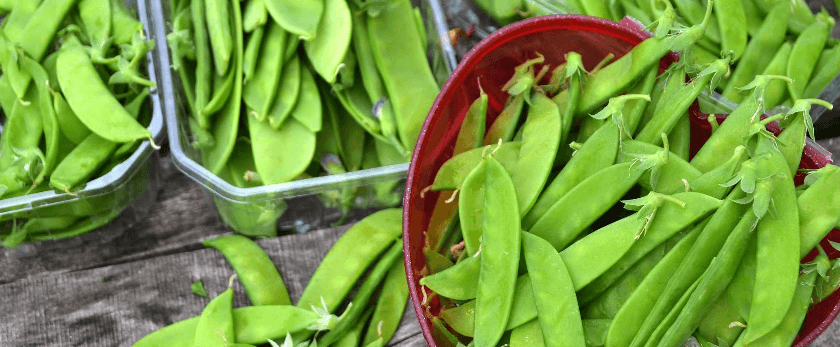
Harvesting Snow Peas
Snow peas are ready to harvest when the pods are plump and the peas inside are still small. You can pick them by gently pulling the pods off the plant or using scissors. Make sure to harvest them regularly to encourage continuous production.
Responsible Disposal Methods
Once you have harvested your snow peas, it is important to dispose of any leftover plant material responsibly. You can compost the plant debris or add it to your green waste bin if your local waste management system allows it. This will help reduce the amount of waste sent to landfills and contribute to a more sustainable future.
Conclusion
Growing snow peas is a rewarding experience that can provide you with a delicious and nutritious addition to your meals. By following these simple steps, you can successfully grow snow peas in your own backyard. Remember to choose the right time to plant, provide adequate care, and dispose of any leftover plant material responsibly. Happy gardening!